

STRANDS OF JOY VOL II BY ANNA JOHANNA


Blocking Your Hand Knits
You may have heard the term ‘blocking’ in relation to your knitting. It might be something you are familiar with or it may be something that is a completely alien concept to you. Never fear, this quick guide should give you everything you need to know to get you started with blocking.
What is blocking?
Essentially it is the process of wetting, or dampening, your knitting, reshaping the piece and then allowing it to dry.
Why block?
I like to think of blocking as a little pamper session for your knitting, getting it ready to face the world after the hard work of being created. Essentially it allows the fibres to relax and evens out your knitting. Natural fibres are very forgiving and blocking will add the finishing touch to your knitting. It also gives you the chance to shape the knitting and accentuate the best bits, for example lace or cables etc.
What blocking can’t do?
Blocking might seem like the catch all solution to your knitting woes. While the process of blocking is a powerful one it, unfortunately, can’t solve all your problems. If you have forgotten some increases or decreases, accidentally knitting one sleeve an inch shorter than the other or fallen prey to dropped stitches or extra yarn overs and the odd hole in your knitting, blocking is not going to fix these.
What blocking can do?
It evens tension. After all you are not a machine and your tension probably varies ever so slightly as we knit. Blocking will smooth the stitches and make your fabric look fabulous.
It can even the sizing of knitted pieces. Remember it can’t add an inch that you forgot to knit but it can ensure your knitted pieces are all exactly the size they should be, and that they match each other. Providing, of course, that you block with the aide of a ruler! This is essential for seamed garments, I highly recommend you block before you seam.
The magic of blocking really comes into play when you have lace knitting. Whether you have created an ornate lace shawl or have a delicate lace panel running down the centre of your new jumper. It needs blocking! Trust me, if you have never blocked something like lace before, be prepared to be amazed. You can take that, possibly unattractive looking, crumpled pile of knitting and transform it into something majestic.
How do I block my knitting?
A note about blocking methods:
The two most common methods of blocking are wet blocking and steam blocking. I will not really delve into steam blocking here as my preferred method is wet blocking and I think it yields excellent results.
In summary steam blocking is done with an iron and a wet tea towel, or a professional steam blocker if you are fortunate to own one. I am hesitant to start wafting hot steam around, mainly because I tend to be accident-prone and this all sounds like a recipe for disaster. Steam blocking does have its place though.
Tools of the trade
As with all things in life you can go wild buying all the latest gadgets for the task in hand. Conversely you needn’t spend a fortune on the latest and greatest of everything and should be able to achieve great results. After all, most of the time it is technique that rules over tools.
Essentials
Water and a bucket or suitable vessel for containing the water while you soak your knitting.
What you choose really depends on what you are blocking. I sock a single pair of socks in a medium salad bowl and larger items in the bath. You may choose to use a sink, wash basin or plastic bucket. As long as it is clean, large enough for your knitted item and holds water you should be good to go.
Wool wash.
Some people advocate other things but I am a firm believer in a great wool wash. Having spent money buying good yarn and time spent creating a beautiful finished object I think your knitting deserves a lovely bubbly ‘bath’. There are a number of great products on the market. SOAK is a good option and Rachel stocks it, it comes in a range of heavenly scents and leaves your knitting smelly utterly delicious.

A towel.
This is for squishing the water out of your knits. Note I did not say wringing, please be gentle with your wet knitwear!
A flat surface (and something to pin into if you need to pin your knitting into shape)
A table, open space of floor or bed works well. If you are going to use your bed remember you will need to sleep and knitting can take a while to dry, especially in the colder northern climes.
If you need to pin your knitting you need a good surface to pin into. Blocking boards are excellent,foam tiles (the ones kids play with) are equally good, as is a yoga mat.
Optional extras depending on the type of blocking you are doing
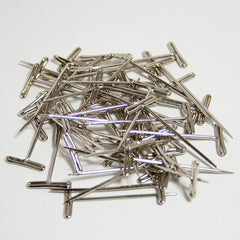
Pins
You will only need these if you need to pin your knitting out. You definitely need them for lace shawls and might need them for garments and accessories. Dress making pins are essentially fine but T-Pins are much better, easier to use and allow you to really maximise the strength of blocking wires.
Blocking wires
These are a marvellous tool and well worth the financial investment. They allow you to block things to shape, maximising straight lines without the dreaded pin pulled v-shapes you get if you only use pins. The nicer blocking wires will also block your knitting into a fabulous curved shape, perfect for shawls and other curvy knitting needs.

Balloons
Say what?! Did you say …. Balloons? Yes indeed I did. I know you might have heard of a blocking party (a loosely used term by knitters to refer to the party like atmosphere when you finish and block all your knits). These balloons aren’t for the party though. They are PERFECT for blocking hats! Trust me, once you have blocked a hat over a balloon you will never look back. You also need a trusty mug to sit your balloon in as it dries.
The basic blocking method
![]()
1) Fill your chosen vessel with tepid water and wool wash. No hot water please folks, remember the key to felting fibre is hot water and agitation. You are not aiming for felted knits, so warm and gentle please.

2) Soak your knitting. You can soak more than one item if needed, just adjust the water and wool wash ratio. Remember that some brighter colours may have excess dye that runs when you first soak them. Best not to combine that white wedding shawl with your new red socks.

3) Carefully lift the soaked item from the water and gently squeeze out the extra water. Gently does it!
4) Lay the item flat onto a towel and carefully roll it up. Press down on the towel to squeeze out the excess water.


5) Take your knitted item and start the blocking process.
6) Before you start pinning or shaping, carefully consult your schematic for the suggested dimensions and shape of the finished item. This is crucial for garment pieces!
7) If you are blocking a lace shawl use blocking wires and pins to shape the shawl as shown below. I tend to use as many blocking wires as I can to create and control the shape. Pin the wires into place as shown.


8) If you are blocking a garment decide whether you need the rigidity of blocking wires or if you would prefer to smooth out the garment and gentle ease it into shape. More often than not I choose the latter method, but each garment has different needs. If you are in doubt consult the pattern or check what others have done on Ravelry. If you are really worried about the best way to block your garment pieces drop the designer a message, the vast majority of designers are happy to help out where they can.
9) If you are blocking a hat, get those balloons and prepare for your blocking party. This method words best for beanies, toques and slouchy hats. Pop the balloon inside the hat and blow it up, paying careful attention to the size of the balloon versus the size of the hat you are aiming for.

Tams and berets may be better off over a plate, but be careful not to stretch the brim too much.
10) If you are blocking socks or mittens you may benefit from a set of blockers purpose built for these items. You can always dry them flat, but you will see the benefit of blocking them to the correct shape.


11) Leave the item to dry in situ. Try not to move it too much, and definitely do not hang it to dry as this will result in a misshapen piece of knitting.
Hope this has helped.
Happy blocking!
Clare
About the Author
 Clare Devine is a writer and designer. Originally from South Africa she has nomadic tendencies and is currently knitting her way around the UK. She is passionate about all things fibre related (especially if it’s grey), knitting, travel and sunshine in equal measures.
She regularly blogs at www.yarnandpointysticks.com. You can find her on Ravelry as Knitsforklipskaap, Twitter as @_ClareDevine and Instagram as @Clare.Devine.