

STRANDS OF JOY VOL II BY ANNA JOHANNA


Mastering Steeking: Conquer Your Yarn Fears with Confidence

When it comes to knitting, there's a technique that can cause both awe and anxiety: steeking. The mere mention of it might send shivers down the spines of even the most experienced knitters, but you know what, it's actually not that hard, and not something you should shy away from, and we're going to tell you why!
Today we're going to demystify the art of steeking and show you how to conquer this technique with confidence and embrace the world of steeking. Are you ready?

So, what is a 'Steek' anyway, and why add one?
In a nutshell, a steek is a deliberate cut made in your knitting to create openings or to turn a circular piece of knitting into a flat one. They are often used in projects with colourwork or complex patterns.
Extra stitches are added to where you will make the cut, these are your safety stitches, aka "steek stitches," and when the big moment comes and you're ready to cut, these trusty stitches take one for the team, making sure your main pattern stays totally unscathed.
Steeking allows you to effortlessly integrate colourwork designs into your knitting projects, like Fair Isle or stranded knitting, or textured patterns. You can knit garments in the round, and maintain the flow of your colourwork or pattern design without having to make adjustments for armholes, necklines, or other openings. This ensures that your intricate motifs are preserved and showcased seamlessly. The result? A more streamlined and polished finished product!
Steeking Step-by-Step
So let's really break things down and look at how to steek step-by-step. This tutorial features Tangled Cowl by Flossi Knits. The wonderful Claire aka Flossi Knits has designed this cowl with an introduction to steeking in mind!

1. Planning and Preparation
Knit your project in the round, ensuring you leave space for the steek. In the Tangled Cowl, you can see in the image above that we have 5 stitches for the steek, defined by alternating the main and contrasting colours. Once the cowl is complete, none of these stitches will be seen from the right side.
2. Reinforcing the Steek
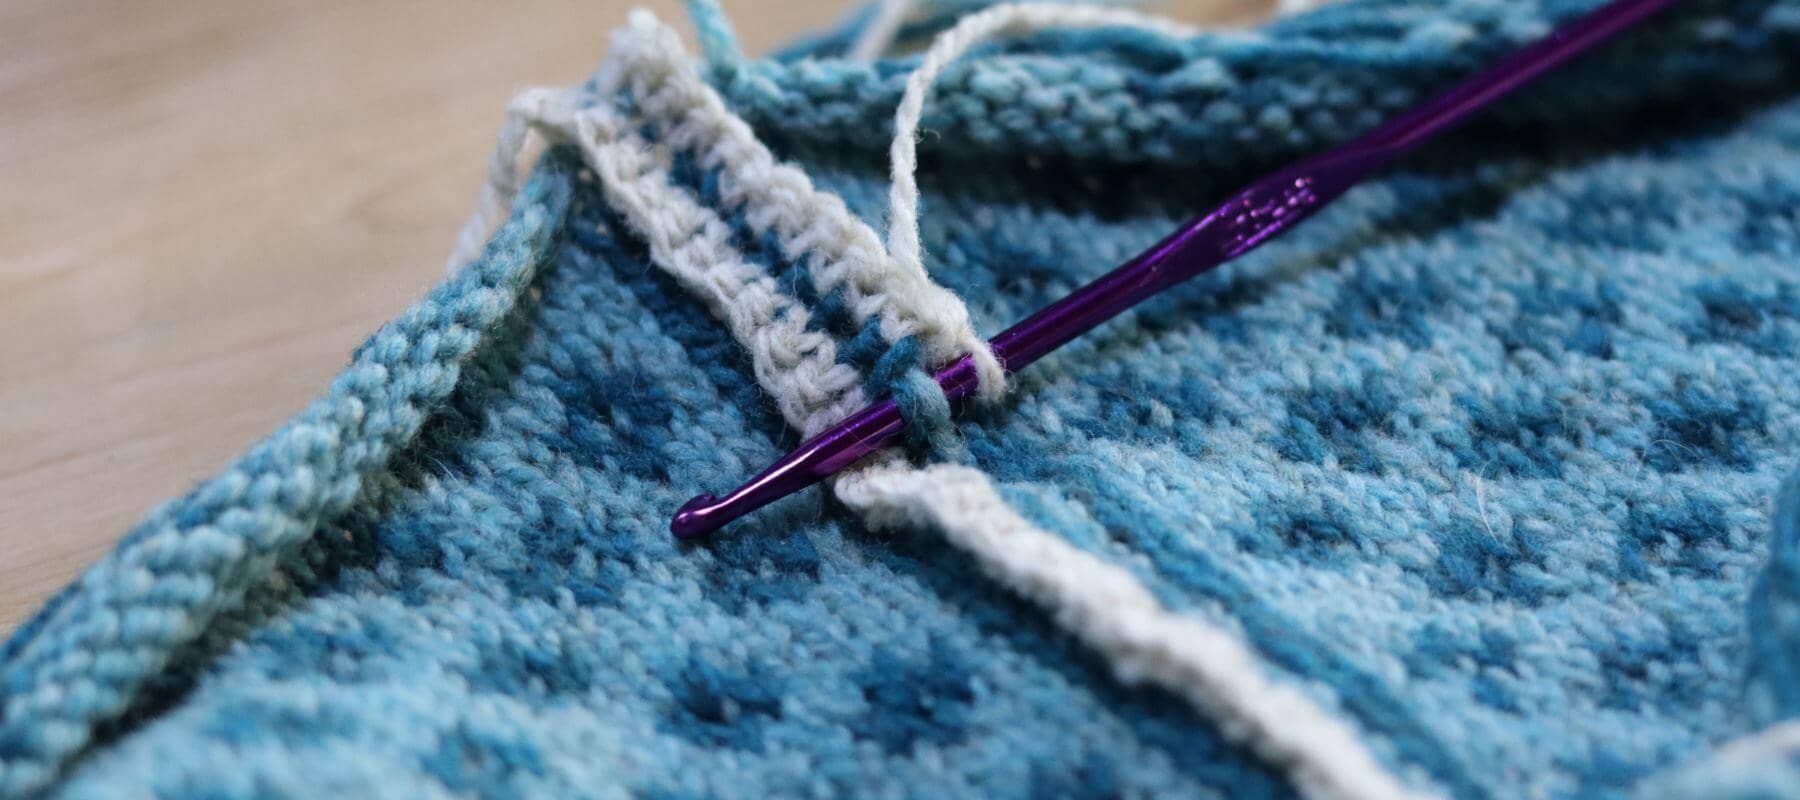
For the Tangled Cowl, we used the crochet method* to reinforce the steek stitches. It creates a lovely neat edge and gives a clear guide for when it comes to cutting your steek.
For this method, use a feltable (non-superwash) wool yarn and a crochet hook a size or two smaller than the knitting needle size you used. For this tutorial, we have used a contrasting colour yarn so you can clearly see the crochet line, but using one to match your work will give a more subtle finish.
*if the crochet method doesn't appeal to you there are other ways to reinforce your steek. Check out our post 'Steeking FAQs'!
For this method, you’ll work two lines of crochet to secure your stitches on either side of Steek Stitch 3 as follows.
Set-Up Step 1. Make a slip knot on your crochet hook, then insert it from front to back through the Cast On edge directly under the 4th steek stitch. Pull yarn loop through so you have two loops on your hook.
Set-Up Step 2. Using the working yarn, pull another loop through the two loops on the hook so you have one hook
The edge stitches are secure and you can proceed to Step 1.

Step 1. Insert your hook through the Right Leg of the 4th stitch (light blue) and the Left Leg of the 3rd stitch (dark blue).
Step 2. Pull a loop through both stitch legs so you have two loops on your hook.
Step 3. Pull another loop through both loops so you have one loop on your hook.
Continue moving up the 3rd and 4th steek stitches in this manner, securing Left Legs to Right Legs, until you reach the Bind Off edge.
Step 4. To secure the stitches on the Bind Off edge, insert your hook through a bound-off stitch above Steek Stitch 4. Pull a loop through so you have two loops on your hook.
Step 5. Pull another loop through both loops already on the hook so you have one loop.
Step 6. Break your yarn and pull through the remaining loop on your hook.

To complete the second crochet line, join your yarn at the Bind Off edge, above Steek Stitch 2, following the Set-Up instructions for attaching your yarn.
Continue down the steek in the same manner as you did for the Left Side, but this time insert your hook through the Left Leg of Steek Stitch 2 (light blue) and the Right Leg of Steek Stitch 3 (dark blue). Once complete, you will have two crochet lines running down the centre of your steek. If you look between the two you will see the horizontal bar of Steek Stitch 3. This is what we're going to cut!

3. The Moment of Truth – Cutting
Lay your reinforced steek flat on a stable surface. Take a deep breath – it's time to cut! Use sharp scissors to snip the horizontal bars of Steek Stitch 3 between your crochet lines. Take your time and carefully work from bottom to top.

4. Finishing Touches
Weave in your ends and admire your work!
And there you have it, didn't we say it wasn't super scary?! At this point with the Tangled Cowl, you'd go on to add the ribbed edge, and if you think you'd like to give it a go, check out the pattern here!
